Dials: Difference between revisions
No edit summary |
(→DIALS) |
||
| Line 7: | Line 7: | ||
Remove the front panel by: |
Remove the front panel by: |
||
<ul> |
<ul> |
||
<li>remove the TUNING and LOADING knobs (Bristol wrench required, <b>not Allen</b></li> |
<li>remove the TUNING and LOADING knobs (Bristol wrench required, <b>not Allen</b>)</li> |
||
<li>remove the BANDSWITCH knob (also Bristol)</li> |
<li>remove the BANDSWITCH knob (also Bristol)</li> |
||
<li>remove three top front screws</li> |
<li>remove three top front screws</li> |
||
Latest revision as of 17:16, 14 November 2020
DIALS
The dials which were installed on my 30S-1 when I acquired it were degraded - one had been broken and glued (neatly) back together. The other had smeared markings at one end of the dial. Neither were show-stoppers, but things like that will grate on me if they are left...
I bought a pair of (used-but-good) replacement dials from a Collins-email-Lister, which are completely satisfying :-)
Remove the front panel by:
- remove the TUNING and LOADING knobs (Bristol wrench required, not Allen)
- remove the BANDSWITCH knob (also Bristol)
- remove three top front screws
- remove lower power-supply compartment door, to subsequently remove four under-lip screws
- gently grasp / wiggle / pull the panel out. I tug the lower edge out first, by holding the Multimeter knob, and the toggle-switches
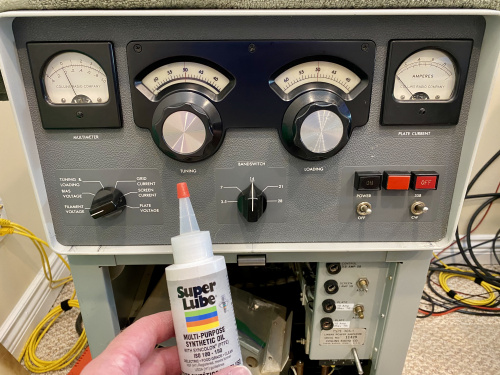
Yay! The front panel is back together again. Also shown: my favourite lube for things like shaft-bushings. I had to apply partial-drops to the end of a piece of wire, then guide the small amount of lubricant into several tight areas. Capacitor-, switch- and pulley-shafts were all treated to this stuff (which, BTW, worked miracles on the screeching helical-gears in my TS-850's antenna-tuner).
Some quick notes:
- dials pretty much go all the way back, very nearly touching the lamps. Otherwise they will contact the back of the escutcheon
- lightly snug the two Bristol set-screws, test-fit the panel, and if the red line isn't where you want, you can gently use your fingers on the outer edge of the dial to rotate it until you are satisfied with the line-up. Lots of panel-on / panel-off... Snug the Bristols.
- insert the top edge of the panel first, then pivot / push the lower edge into place. Try to avoid scuffing :-O :-(
- the SSB/CW switch-wires will contact a pulley-bracket. The bracket is insulated, but it bears close inspection - I used a shaving-mirror to look up from the Power Supply compartment - but really, all I could tell was that it was scrunched :-(
